
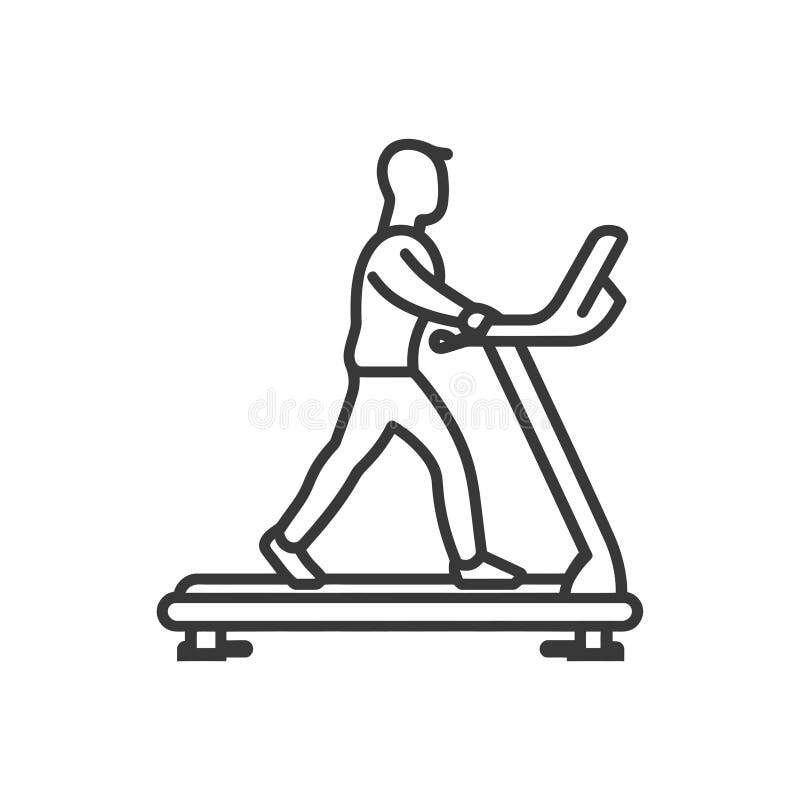
How To Draw A Treadmill: Easy Step-By-Step Guide
Draw a treadmill with simple geometric shapes, clean perspective lines, and small details added in clear layers.
Learning how to draw a treadmill is easier when you break the machine into basic forms. A treadmill has a long running deck, a raised console, side rails, and a strong frame. This guide uses simple drawing methods, practical perspective tips, and easy steps to help beginners create a clear and realistic treadmill sketch.
What You Need to Draw a Treadmill
You do not need expensive art tools to begin. A pencil and plain paper are enough for your first treadmill drawing.
Helpful supplies include:
• HB pencil for light construction lines
• 2B pencil for darker outlines
• Eraser for cleanup
• Ruler for straight edges
• Fine-tip pen for final lines
• Colored pencils or markers for added detail
• Drawing paper with a smooth surface
Start with light lines. Dark lines are harder to erase, and early shapes often need small changes. Think of your first marks as a framework, much like the metal frame inside a real treadmill.
A reference photo can also help. Choose a side view or three-quarter view with clear lighting. A simple reference makes it easier to see the belt, handrails, and control panel.

Understanding the Basic Shape of a Treadmill
Before you draw a treadmill, study its main parts. Understanding the structure helps your sketch look accurate instead of flat.
Most treadmills contain these visible parts:
• Running deck: The long platform where a person walks or runs
• Belt: The dark moving surface on top of the deck
• Front housing: The larger cover near the console
• Console: The screen and control panel
• Uprights: The posts that connect the deck to the console
• Handrails: The bars used for balance
• Base frame: The support structure below the deck
• Rollers: The rounded parts beneath or inside the belt
• Feet or wheels: Small supports at the bottom
The running deck is usually a long, narrow shape. The console is wider near the top and often tilts toward the user. The handrails may look simple, but their angle can strongly affect the pose of the entire drawing.
A useful way to plan the image is to imagine the treadmill as several boxes. The deck is a long box, the console is a short box, and the support posts are narrow rectangular blocks. Once these forms look right, the final treadmill drawing becomes much easier.

How to Draw a Treadmill Step by Step
Follow these steps to create a clean treadmill sketch. Keep your first lines light and focus on proportion before detail.
1. Draw the running deck
Begin with a long, narrow rectangle that slopes slightly upward toward the front. If you want a three-quarter view, draw it as a long parallelogram instead of a flat rectangle.
The front of the deck should be a little wider or more visible than the back. This creates depth. Do not make the deck too short, because the running surface is the main visual feature of a treadmill.
2. Add the treadmill belt
Draw a second shape inside the deck. Leave a small border around it to show the frame.
The belt should follow the same perspective as the deck. At the front and back, add curved edges to suggest rollers beneath the belt. These curves should be subtle. A very round belt can make the treadmill look like a conveyor machine.
3. Build the front housing
At the front of the deck, add a raised cover. This part protects the motor and often has a smooth, rounded design.
Use a box shape first. Then soften the corners with curved lines. Many modern treadmills have a sloped front housing, so avoid making it perfectly vertical unless your reference shows that shape.
4. Draw the upright supports
Add two narrow posts that rise from the front sides of the deck. The posts support the console.
Keep both uprights aligned with the treadmill’s perspective. If one post leans too far, the whole machine may look unstable. Light vertical guidelines can help you keep the supports balanced.
5. Add the console
Place the console at the top of the supports. Start with a simple wide rectangle or trapezoid.
Most consoles angle slightly toward the person using the treadmill. Draw the screen in the center and leave room for buttons below it. The screen does not need many details. A few small rectangles can suggest speed, time, distance, or heart rate displays.
6. Draw the handrails
Add handrails from the upright posts toward the user. They may extend forward, curve upward, or run beside the console.
Use two parallel lines for each rail. Keep the space between the lines consistent. Uneven rails are one of the most common mistakes when people learn how to draw a treadmill.
7. Add the base and support feet
Look beneath the deck and draw the lower frame. Use thin bars or short rectangular forms to show the support structure.
Add small wheels near the front or rear. These details help the machine feel grounded. Do not add too many lines under the deck, since a crowded base can make the sketch hard to read.
8. Refine the outline
Now inspect the whole drawing. Correct the deck angle, console size, and rail position before adding texture.
Use a darker pencil or pen to trace the important outer lines. Keep some inside lines lighter. This difference creates depth and helps the main silhouette stand out.
9. Erase construction lines
Carefully remove extra guidelines after the final outline is complete. Leave small interior marks if they help show the belt, screen, or frame.
A clean drawing does not need every part to be dark. Good line control often looks more realistic than heavy shading.
10. Add shading and color
Shade beneath the deck, under the console, and around the belt edges. These darker areas show where parts overlap.
For a realistic treadmill drawing, try this simple color plan:
• Black or dark gray for the belt
• Medium gray for the frame
• Light gray for plastic covers
• Blue or green for the display
• Black for rubber handgrips and wheels
Use smooth shading on plastic parts and darker shading in narrow gaps. This makes the treadmill look solid without requiring complex rendering.

How to Use Perspective When Drawing a Treadmill
Perspective gives a treadmill depth. Without it, the machine may look like a flat diagram.
For a beginner-friendly approach, use one-point perspective. Imagine a small vanishing point in the distance. Lines that move away from you should angle toward that point.
In a three-quarter treadmill drawing:
• The near side should appear larger
• The far side should appear slightly smaller
• Parallel deck edges should angle in the same direction
• The front housing should show more detail than the rear
• The console should follow the same viewing angle as the deck
You can also use two-point perspective for a more dramatic view. In this method, left-facing and right-facing edges move toward different vanishing points. It can create a strong product illustration, but one-point perspective is often easier for a first attempt.
A common mistake is to draw each part from a different angle. For example, the belt may show a side view while the console faces straight forward. Keep one consistent viewpoint from start to finish.

How to Make a Treadmill Drawing Look Realistic
Realism comes from proportion, light, texture, and small design choices. You do not need to draw every screw or button.
Focus on the parts that viewers notice first:
• The long shape of the running deck
• The angle of the console
• The curve of the handrails
• The dark belt inside the lighter frame
• The shadow beneath the machine
• The difference between plastic, metal, and rubber
Use edge variety to improve the drawing. A sharp edge can show a hard metal corner. A soft edge can suggest molded plastic. Short, dark strokes can represent rubber grips.
Add a cast shadow below the treadmill. The shadow should sit on the floor and follow the direction of the light. If the light comes from the upper left, place darker shading beneath the right side and under the deck.
For a simple product-style illustration, keep the background plain. A pale floor line or soft oval shadow is enough. For a room scene, you can place the treadmill near a wall, window, or gym mirror.

Common Mistakes to Avoid
Many beginner drawings fail because of proportion, not lack of detail. Fix the large shapes first.
Watch for these errors:
• Making the running deck too short
• Drawing the console too large
• Forgetting the belt border
• Placing the handrails at different heights
• Using heavy lines for every part
• Drawing wheels that are too large
• Adding buttons before fixing the structure
• Mixing front, side, and top views
• Making the treadmill float without a floor shadow
One lesson I often apply in object sketching is to pause before outlining. Squint at the reference or finished sketch. If the silhouette still looks like a treadmill, the structure is working. If it does not, more detail will not solve the problem.
Another useful habit is to turn the paper upside down for a moment. This can reveal tilted edges and uneven spacing that are easy to miss when you look at the drawing normally.

Easy Treadmill Drawing for Kids and Beginners
A child or complete beginner can simplify the process into five shapes:
- Draw a long slanted rectangle for the deck.
- Add a smaller dark shape inside it for the belt.
- Draw two posts at the front.
- Add a wide console at the top.
- Finish with rails, wheels, and a floor shadow.
Use large, clear shapes instead of tiny controls. The goal is recognition, not technical detail.
For a fun cartoon treadmill, exaggerate the display and use rounded corners. You can add a smiling face to the screen, bright colors, or a stick figure running on the belt. These changes teach shape control while keeping the activity enjoyable.
For school projects, label the parts of the treadmill. Labels can include belt, deck, console, handrail, motor cover, and frame. This turns a simple sketch into an informative diagram.

How to Draw a Treadmill From Different Views
Learning several views helps you understand the machine instead of copying one picture.
Side view
A side view shows the deck length, belt slope, front housing, and support posts. It is the easiest view for beginners because fewer parts overlap.
Front view
A front view shows the width of the console, handrails, screen, and two upright supports. Use symmetry guidelines to keep the left and right sides balanced.
Three-quarter view
A three-quarter view shows the front and one side at the same time. It looks more realistic, but it requires careful perspective.
Top view
A top view shows the belt and deck shape clearly. The console may be partly hidden behind the front housing. Use this view to study width and spacing.
When practicing, draw the same treadmill from two or three views. This builds visual memory and helps you understand how each part connects.
Practice Exercises to Improve Your Treadmill Sketch
Short practice sessions can improve your drawing faster than one long, tiring attempt.
Try these exercises:
• Draw five deck shapes using different angles
• Sketch ten console designs in two minutes each
• Practice parallel handrails without adding details
• Shade three belt surfaces with different light directions
• Draw the treadmill as boxes before adding curves
• Copy a simple reference, then redraw it from memory
• Use tracing paper to study the main angles, then sketch freely
Start with a five-minute thumbnail. A thumbnail is a small, quick drawing used to plan shape and placement. It helps you test the pose before spending time on a detailed version.
If your first treadmill drawing looks uneven, that is normal. Mechanical objects can feel difficult because they combine straight lines, curves, symmetry, and perspective. Each attempt gives you better control.
Digital Tools for Drawing a Treadmill
You can draw a treadmill on a tablet or computer using the same basic method. Begin with a sketch layer, then create a clean outline layer above it.
Useful digital features include:
• Shape tools for the deck and console
• Perspective guides for accurate angles
• Layer controls for separating parts
• Clipping masks for color and shading
• Eraser tools for clean edges
• Transform tools for adjusting proportions
Keep the construction layer at low opacity. This lets you see the guide without allowing it to overpower the final line art.
Digital drawing makes it easy to test colors and undo mistakes. However, it can also encourage too much editing. The key skill is still observation. Software cannot fix a console that was placed at the wrong angle or a belt that is too short.
Frequently Asked Questions About How to Draw a Treadmill
What is the easiest way to draw a treadmill?
Start with a long slanted rectangle for the deck and add the belt inside it. Then build the front housing, upright supports, console, and handrails with simple shapes.
How do you draw a treadmill in perspective?
Choose a viewing angle and keep all receding lines consistent. One-point perspective is easiest because the deck edges can move toward one vanishing point.
How do you draw the belt on a treadmill?
Draw a smaller shape inside the running deck, leaving a narrow frame around it. Add slight curves at the front and back to suggest the rollers beneath the belt.
How can I make my treadmill drawing look 3D?
Use overlapping shapes, darker shading under the deck, and a cast shadow on the floor. Make the closer side slightly larger than the far side.
What colors should I use for a treadmill drawing?
Dark gray, black, silver, and blue work well for a modern treadmill. You can also use bright colors for a cartoon style or match the colors in your reference image.
Why does my treadmill sketch look flat?
The parts may not share the same perspective, or the drawing may lack shadows. Check the deck angle, console tilt, overlapping parts, and darker areas beneath the machine.
Can children learn how to draw a treadmill?
Yes. Children can use five basic shapes: a deck, belt, two posts, a console, and handrails. Large forms and simple colors make the activity clear and enjoyable.
Conclusion
Drawing a treadmill becomes much simpler when you build it from basic shapes. Start with the deck, add the belt, create the supports and console, then refine the rails, frame, shading, and small details.
Keep your lines light during the planning stage and use one consistent perspective. Whether you want a realistic product sketch, a labeled school drawing, or a fun cartoon treadmill, steady practice will improve your results. Try drawing the same machine from a side view and a three-quarter view, then share your progress or explore more step-by-step drawing guides.

Brandon Knoxley is a sport & fitness writer and training guide contributor at MySportFitHub. He focuses on practical workouts, performance-based training, and honest fitness gear insights designed for real people and real results. Brandon is passionate about helping beginners and active individuals train smarter, avoid common mistakes, and build sustainable fitness habits.


