How To Replace A Treadmill Belt: Easy Step-By-Step Guide
To replace a treadmill belt, unplug the machine, remove the covers, fit the new belt, then align and tension it.
Learning how to replace a treadmill belt can save money and restore a smooth, safe workout. The job looks large at first, but it is manageable with the right belt, basic tools, and careful adjustments. This guide explains each step, common mistakes, safety checks, and signs that you should call a professional.
What a Treadmill Belt Does
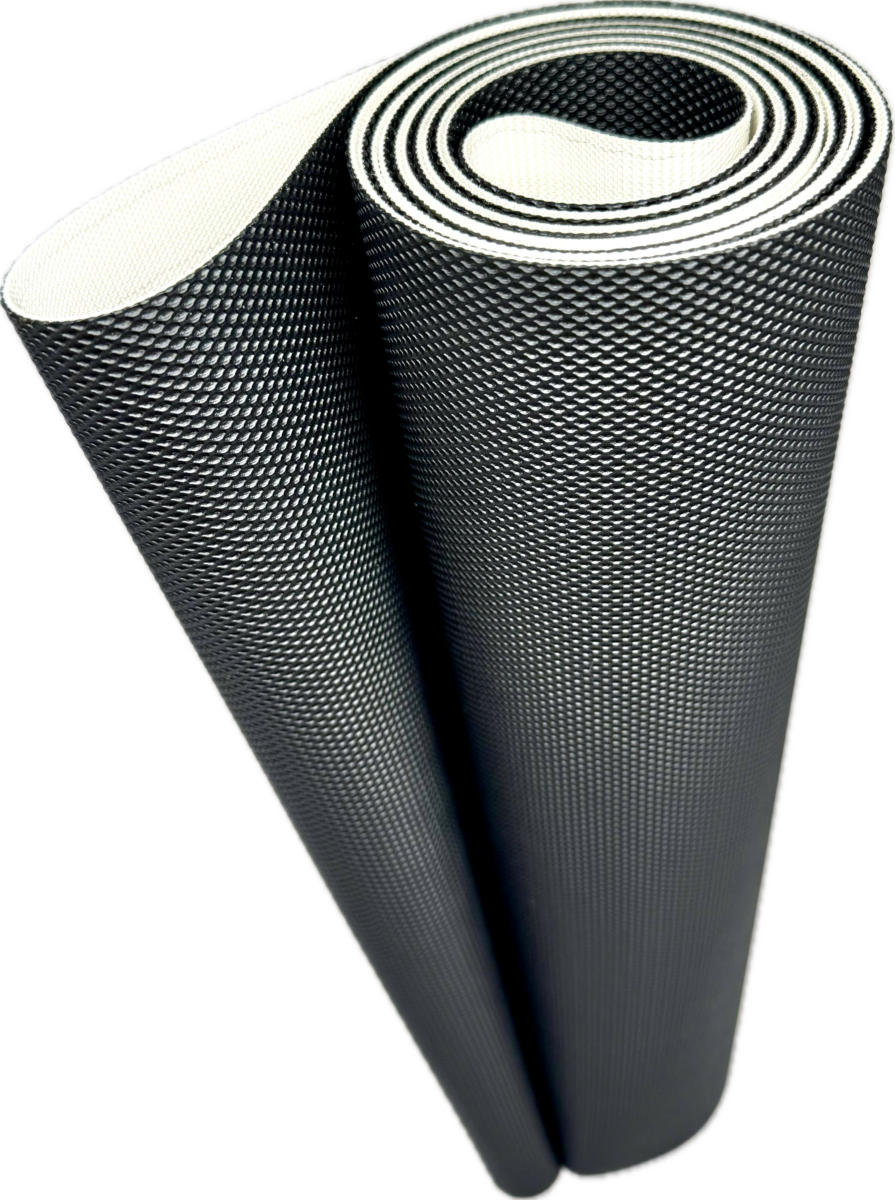
A treadmill belt is the moving walking surface that runs over the front and rear rollers. It sits on top of a flat platform, often called the running deck. When the motor turns the front roller, the belt moves across the deck.
Most treadmills have two different belts:
- The walking belt is the wide belt that you run or walk on.
- The motor drive belt is the narrow belt that links the motor pulley to the front roller.
These belts are not interchangeable. This guide focuses on how to replace a treadmill belt, meaning the wide walking belt. Replacing a motor drive belt uses a different process.
A worn walking belt can increase friction and place extra strain on the motor, controller, and rollers. It may also feel jerky under your feet or slip during use. A new belt can improve comfort, reduce noise, and help the treadmill run more efficiently.

When You Should Replace a Treadmill Belt
A treadmill belt does not need replacement just because it looks slightly dull. Some belts last for years with good cleaning and lubrication. Others wear sooner because of heavy use, poor care, high heat, or a damaged deck.
Look for these signs:
- The belt has visible cracks, tears, or frayed edges.
- The belt slips even after correct tension adjustment.
- The walking surface feels rough, sticky, or uneven.
- You see dark dust near the motor cover.
- The belt slows when you step on it.
- The treadmill makes a repeated thumping sound.
- The belt keeps moving to one side.
- The deck feels hot after a short workout.
- Lubrication no longer improves the belt’s movement.
A belt that slips may only need adjustment. A belt that drifts to one side may only need tracking. However, worn material, exposed fabric, or deep grooves usually means it is time to replace the belt.
Before replacing anything, inspect the deck. Run your hand across it while the treadmill is unplugged. If the deck has deep wear marks, cracks, or rough patches, replace or service it too. Installing a new belt on a damaged deck can shorten the new belt’s life.
Choose the Correct Replacement Belt
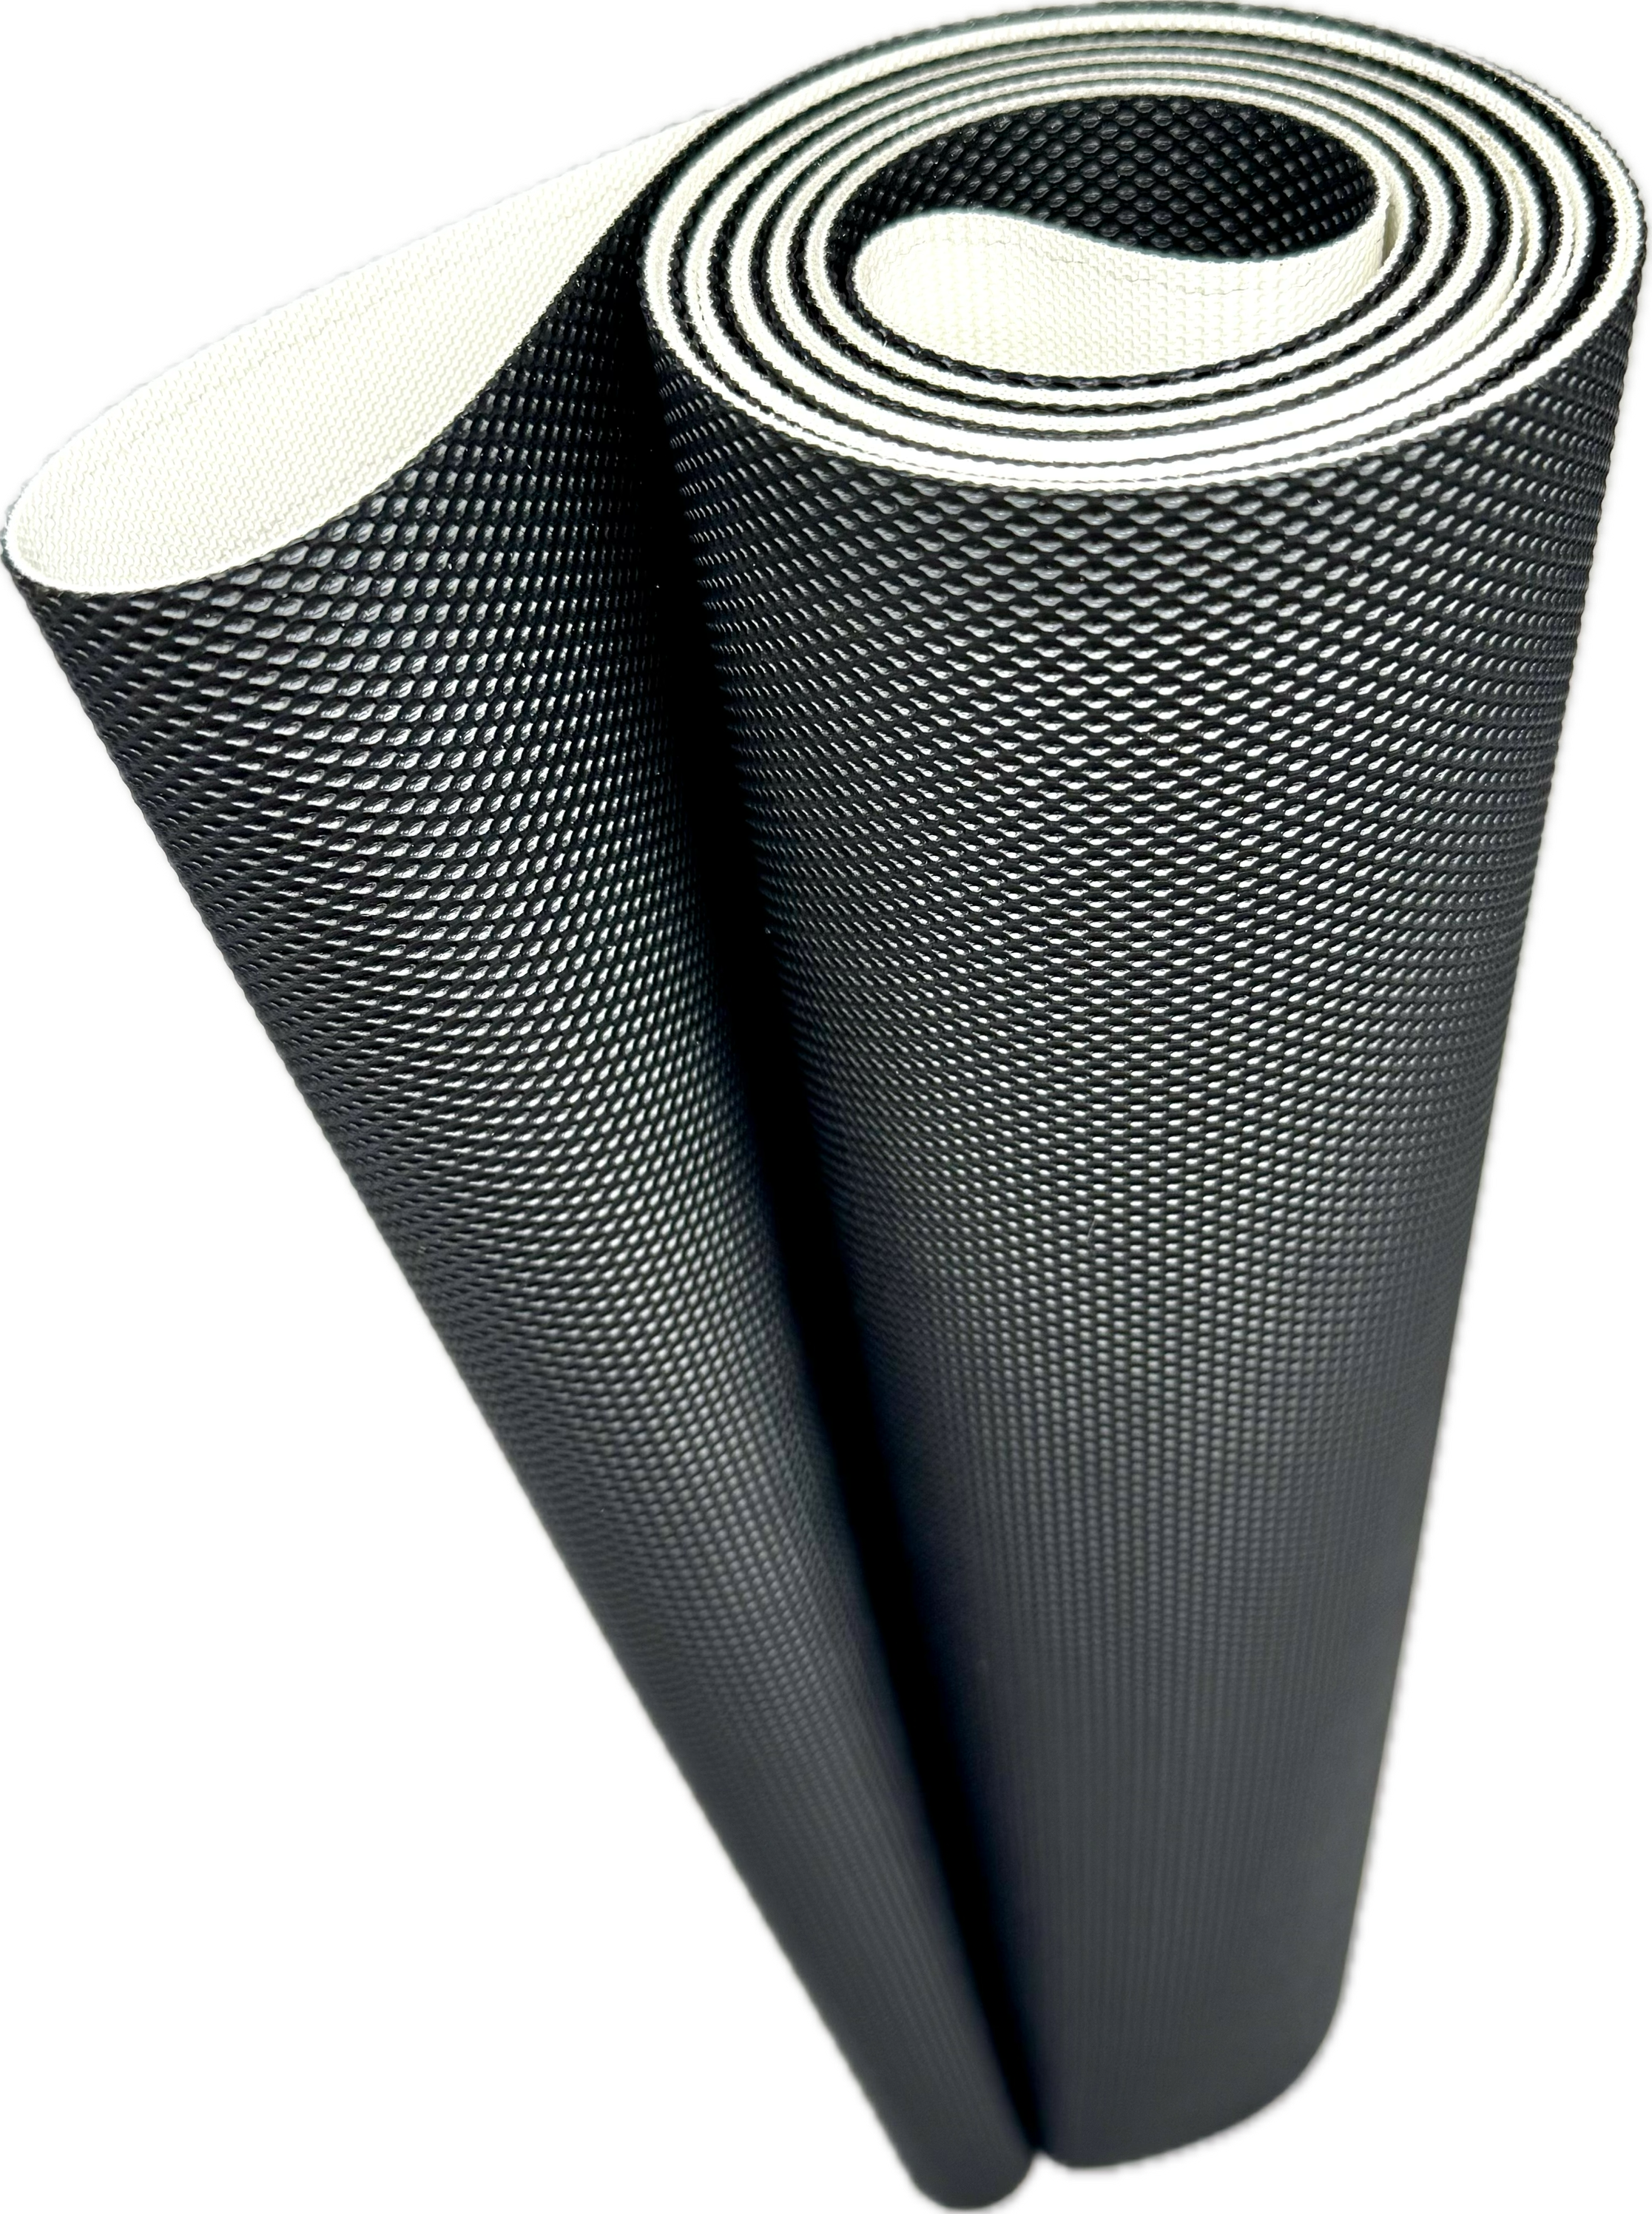
The most important part of learning how to replace a treadmill belt is buying the right belt. Treadmill belts vary by length, width, thickness, texture, and seam design.
Use the treadmill’s model number to find the correct part. The model label may be near the front frame, under the motor hood, or on the side rail. Check the owner’s manual or the manufacturer’s parts list when possible.
Before ordering, confirm:
- Belt length
- Belt width
- Belt thickness
- Belt texture
- Seam style
- Manufacturer and model
- Compatibility with the running deck
Do not rely only on a visual match. Two belts can look similar but have different lengths or widths. A belt that is slightly too long may never track well. A belt that is too short may overstress the rollers and frame.
Some replacement belts come pre-lubricated. Others require silicone lubricant before use. Follow the belt maker’s instructions. Use only treadmill-approved, 100% silicone lubricant. Do not use motor oil, cooking oil, WD-40, or other household sprays.
Measure the Old Belt
If the model number is missing, measure the old belt after removing it. Lay it flat without stretching it. Measure its total length and width.
You can also measure the distance around the deck and rollers while the old belt is installed, but this method is less exact. Belts stretch and wear over time, so the old measurement may not equal the original size.
When in doubt, contact the treadmill manufacturer or a parts supplier. Give them the full model number and serial number.
Tools and Safety Gear You Need
Gather your tools before you start. The exact tools depend on the treadmill design, but most repairs need common hand tools.
You may need:
- Phillips and flat-head screwdrivers
- Allen or hex keys
- Socket set or adjustable wrench
- Torque wrench, if available
- Tape measure
- Marker or masking tape
- Vacuum cleaner
- Clean cloths
- Treadmill silicone lubricant
- Replacement walking belt
- Work gloves
- Safety glasses
Safety comes first. Unplug the treadmill from the wall before removing any cover. Do not rely on the stop key to cut power. The stop key does not remove electricity from the motor controller.
Place the treadmill on a firm, level floor. If you need to lift the walking platform, ask another adult to help. Treadmills are heavy, and a falling platform can injure your hands or back.
Keep screws in labeled containers. Many treadmill screws look alike but have different lengths. Mixing them can damage the frame or plastic covers during reassembly.
How to Replace a Treadmill Belt Step by Step
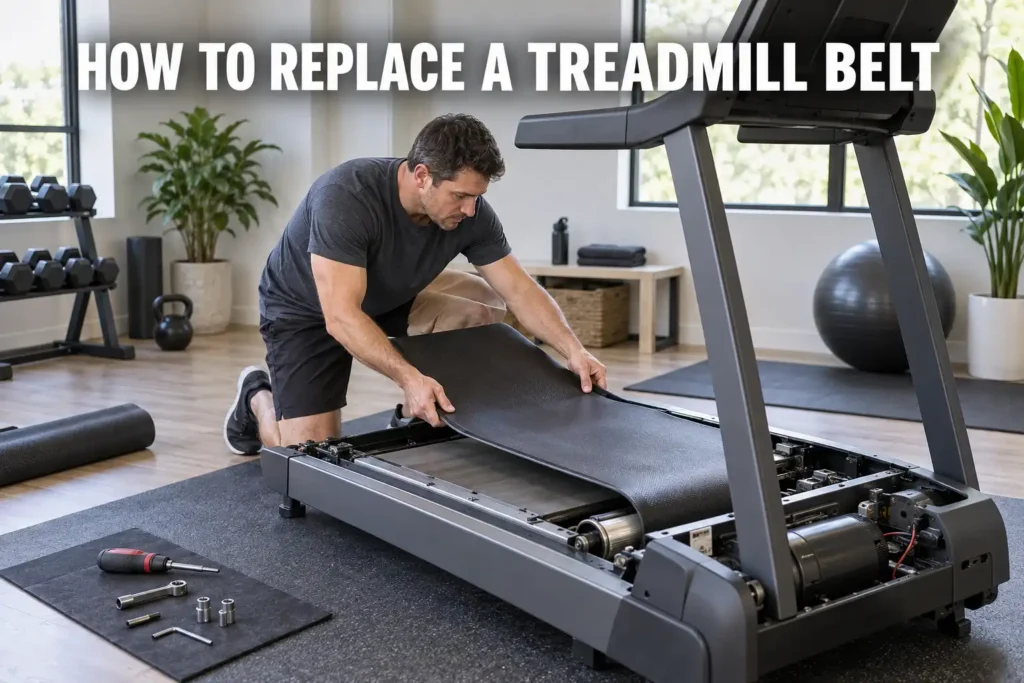
The basic process is similar across many home treadmills. Still, your model may use a different frame or roller design. Stop and check the manual if a part does not move as expected.
1. Unplug the Treadmill
Switch off the treadmill and remove the power cord from the outlet. Wait several minutes before opening the motor cover. This gives stored electrical energy time to discharge.
Keep the power cord away from the work area. Do not plug the machine back in until every cover is secure.
2. Remove the Motor Hood
The motor hood is usually at the front of the treadmill. Remove its screws and lift the cover carefully.
Take a photo before disconnecting or moving anything. Photos help you remember the location of wires, clips, and cable guides. Do not pull on wires or touch the circuit board unless the manual requires it.
Vacuum dust from the motor area. Dust can hold heat and reduce airflow. Use a gentle vacuum rather than compressed air, which can push debris deeper into the electronics.
3. Release the Belt Tension
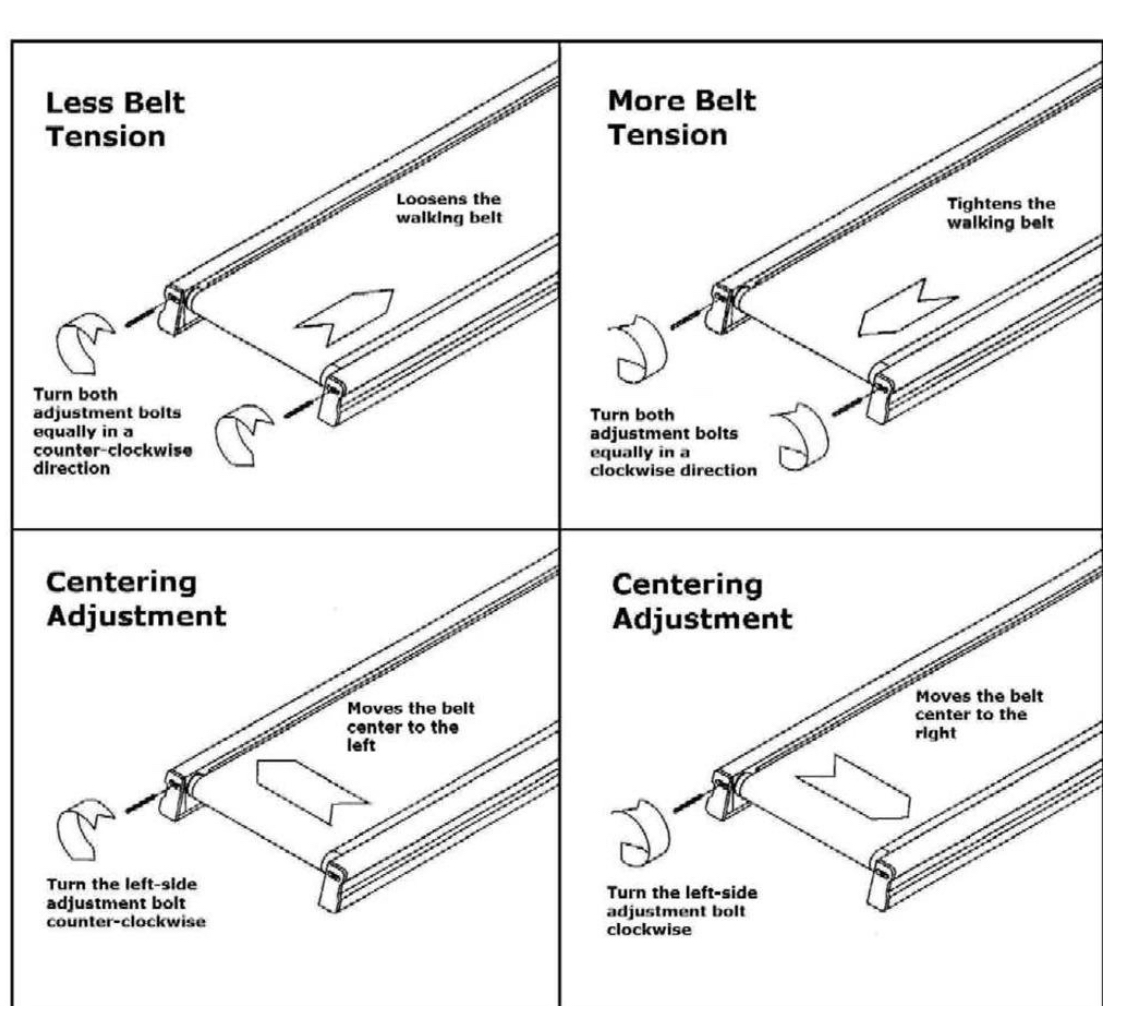
At the back of the treadmill, locate the two rear roller adjustment bolts. Turn each bolt counterclockwise by the same amount to reduce tension.
Make small, equal turns. For example, turn the left bolt two rotations, then turn the right bolt two rotations. Unequal adjustment can move the roller out of alignment.
Some treadmills also have a front roller held by bolts or brackets. Loosen these only as much as the manual recommends. Do not remove parts before noting their position.
4. Remove the Side Rails
Side rails cover the edges of the walking belt. Remove the screws that hold them to the frame.
Some rails slide forward or backward after the screws are removed. Others lift straight up. Use gentle force. If a rail feels stuck, look for a hidden screw near the front or rear.
Place each rail and its screws on the correct side. This simple habit prevents many reassembly problems.
5. Remove the Front Roller
The front roller connects to the drive motor. You may need to remove the motor drive belt before taking out the roller.
Mark the original position of the roller bolts with masking tape. This gives you a useful starting point during reassembly. Then loosen the mounting bolts and slide the roller out of the frame.
Support the roller as you remove it. The roller can be heavy, and the pulley may have sharp edges.
6. Remove the Rear Roller
Loosen or remove the rear roller adjustment bolts. Slide the rear roller out from under the old walking belt.
Inspect the roller shafts, bearings, and pulley. Spin the roller by hand. It should turn smoothly without grinding, wobbling, or excessive side play.
A damaged roller can ruin a new belt. Replace the roller if the bearings feel rough or the shaft is bent.
7. Lift Off the Old Walking Belt
With both rollers removed or moved aside, lift the old belt from the deck. Note the direction of travel if the replacement belt has a marked side or arrow.
This is a good time to inspect the deck. Clean it with a dry or slightly damp cloth, then let it dry fully. Remove any loose plastic, fabric, or dirt from the frame.
In my repair experience, people often skip this inspection because they are eager to install the new belt. That shortcut can hide a rough deck edge or loose fastener. A few extra minutes here can prevent another belt replacement later.
8. Install the New Belt
Place the new belt over the deck. Make sure the walking surface faces upward and the inner surface sits flat against the deck.
Center the belt from side to side. The belt should not fold, twist, or sit under a frame edge. If the belt has a directional arrow, point it toward the front of the treadmill according to the manufacturer’s instructions.
Slide the rear roller into place first, if your design allows it. Then fit the front roller and reconnect the drive belt. Make sure the drive belt sits fully in the motor and roller pulleys.
9. Reinstall the Rollers and Side Rails
Tighten the roller bolts by hand first. Check that the rollers sit straight and that the new walking belt remains centered.
Reinstall the side rails, but do not force them against the belt. The belt must move freely without rubbing the rails.
Replace the motor hood only after you confirm that no wires are trapped. Some people prefer to leave the hood off during the first low-speed test, but exposed moving parts create a safety risk. If you do this, keep hands, clothing, and tools far away from the rollers and motor.
10. Set the Initial Belt Tension
Turn both rear adjustment bolts clockwise by equal amounts. Tighten them enough to remove slack, but do not make the belt extremely tight.
A belt that is too loose can slip. A belt that is too tight can overload the motor, roller bearings, and deck. The correct tension varies by model, so use the manufacturer’s specification when available.
As a general starting point, the belt should lift slightly at the center of the deck. Do not use a fixed lift distance as a universal rule because treadmill designs differ.
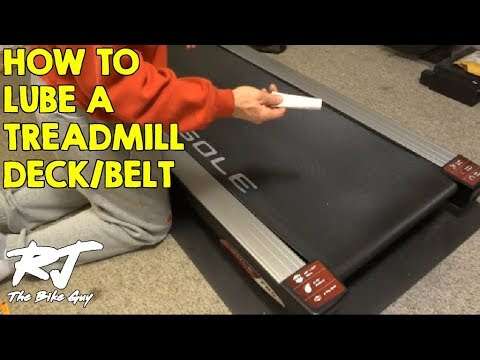
11. Lubricate the Belt if Required
Check the manual before applying lubricant. Some belts use a dry coating and should not receive extra silicone.
If lubrication is required, lift each side of the belt and apply the recommended amount under the belt near the center of the deck. Do not pour lubricant onto the walking surface.
Spread the lubricant by running the treadmill at low speed for a few minutes. Wipe away any excess from the belt and frame.
12. Test the Treadmill
Plug in the treadmill and stand beside it, not on it. Start the machine at its lowest speed. Watch the belt for several minutes.
Check for:
- Side-to-side movement
- Slipping
- Rubbing
- Unusual noise
- Sudden speed changes
- Belt edges lifting from the deck
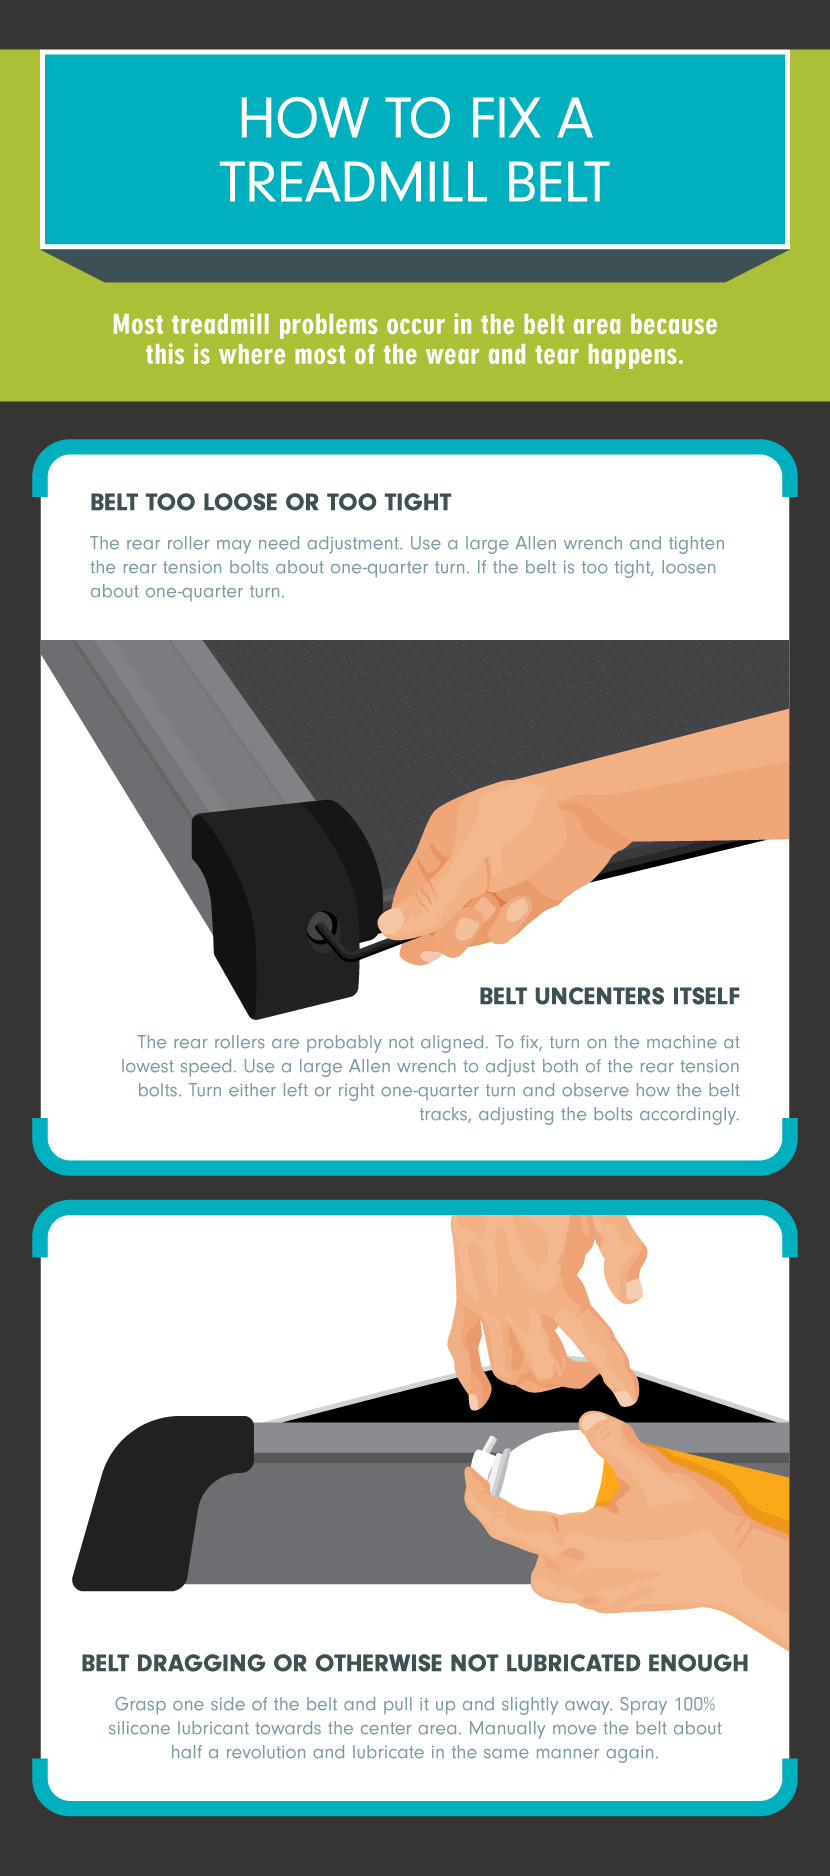
If the belt moves toward the left, make a small adjustment to the appropriate rear bolt according to the treadmill manual. Make tiny changes, such as one-quarter turns, and allow the belt time to respond.
After tracking is stable, walk on the treadmill at a slow speed. Gradually increase the speed and listen for changes. Stop at once if the belt jerks, stalls, or produces a burning smell.
How to Adjust Treadmill Belt Tension and Tracking
Correct tracking is one of the most important parts of how to replace a treadmill belt. The belt should run near the center of the deck without touching the side rails.
Use the rear roller bolts to make small adjustments:
- If the belt moves left, adjust the rear roller according to the manual to guide it back toward the center.
- If the belt moves right, make the opposite small adjustment.
- If the belt slips under your feet, increase tension in equal small steps.
- If the motor struggles or the belt feels very tight, reduce tension slightly.
Never turn one adjustment bolt several full rotations while leaving the other untouched. This can twist the rear roller and make tracking worse.
After each adjustment, run the treadmill for 30 to 60 seconds. A belt may need time to settle. Patience works better than large adjustments.
A useful test is to walk at a slow pace and then at a moderate pace. The belt should stay centered under both conditions. If it tracks well without a user but shifts when someone walks on it, check tension, deck condition, and roller alignment.
Common Mistakes to Avoid
Replacing a treadmill belt is straightforward, but small errors can cause major problems. Avoid these common mistakes:
- Buying a belt by appearance instead of model compatibility
- Installing the belt backward
- Reusing a damaged roller
- Tightening the belt too much
- Adjusting only one rear bolt
- Forgetting to reconnect the motor drive belt
- Applying too much lubricant
- Using household oil
- Trapping wires under the motor cover
- Testing the treadmill before securing loose parts
- Ignoring a worn or cracked deck
- Walking on the belt before checking its tracking
One mistake I have seen often is over-tightening after the first slip. A new belt may slip because it is not centered, because the deck is dry, or because the drive belt is worn. Adding more tension can hide the real cause while placing stress on the motor.
Take notes during disassembly. Write down the number of turns used on each adjustment bolt. This gives you a reference if tracking becomes difficult.

How Much Does Treadmill Belt Replacement Cost?
The cost depends on the treadmill model, belt quality, and whether you do the work yourself.
Typical expenses may include:
- Replacement walking belt: about $100 to $300
- Silicone lubricant: about $10 to $20
- New deck, if needed: about $150 to $400
- Professional labor: often $150 to $400 or more
These are broad ranges, not fixed prices. Commercial treadmills and premium home models may cost much more.
DIY replacement can reduce labor costs, but the belt is only one part of the repair. If the motor, controller, rollers, or deck are also worn, the total cost can approach the price of another treadmill.
Compare the repair estimate with the treadmill’s age, condition, warranty, and replacement value. A high-quality frame with a good motor is often worth repairing. A low-cost treadmill with several failing parts may not be.
How to Make a New Treadmill Belt Last Longer
Proper care can extend belt life and improve performance. The best maintenance schedule depends on use, climate, and the treadmill maker’s instructions.
Follow these habits:
- Keep the treadmill on a clean, level surface.
- Vacuum under and around the machine.
- Wipe sweat from the rails and frame.
- Lubricate only when the manual allows it.
- Check belt tracking every few weeks.
- Inspect the belt for cracks and frayed edges.
- Avoid using outdoor shoes on the belt.
- Do not exceed the treadmill’s user weight rating.
- Let the motor cool during long workout sessions.
- Keep children and pets away from moving parts.
Heavy use needs more frequent inspection. A treadmill used by several people each day may need checks every month. A lightly used home treadmill may need fewer checks, but it still deserves regular care.
The deck also matters. A clean, smooth deck reduces friction. A dry or damaged deck acts like rough sandpaper under the belt.
When to Hire a Treadmill Repair Professional
You can often replace a treadmill belt at home, but some repairs are better left to a trained technician.
Hire a professional if:
- The treadmill has a burnt smell.
- The circuit breaker trips during use.
- The motor makes grinding or electrical noises.
- The control board shows error codes.
- The frame is damaged.
- You cannot identify the correct replacement belt.
- The belt will not track after careful adjustment.
- The treadmill is a commercial or heavy-duty model.
- The machine is still under warranty.
Electrical components can store dangerous energy even after the treadmill is unplugged. Do not open the controller or bypass safety switches unless you have the right training.
A professional can also test motor current, inspect the deck, and measure roller condition. That diagnosis may prevent you from replacing a belt when the real problem is electrical or mechanical.
Frequently Asked Questions About How to Replace a Treadmill Belt
How long does it take to replace a treadmill belt?
Most home treadmill belt replacements take about one to three hours. The time depends on the treadmill design, your tools, and whether the rollers are easy to remove.
Can I replace a treadmill belt myself?
Yes, many home treadmill owners can replace the walking belt with basic tools and careful instructions. However, heavy commercial machines, electrical faults, and damaged frames may require professional service.
How do I know if my treadmill belt is too tight?
A belt may be too tight if the motor struggles, the treadmill slows under light pressure, or the rollers make unusual noise. Loosen both rear adjustment bolts by equal, small amounts and test the machine again.
Why does my new treadmill belt keep moving to one side?
The rear roller may be uneven, the belt may not be centered, or the frame may not be level. Make small tracking adjustments and check that both rear roller bolts are positioned evenly.
Do I need lubricant when replacing a treadmill belt?
Not always. Some belts use a dry coating and should not be lubricated, while others require 100% silicone treadmill lubricant, so check the manual or belt instructions first.
Can a worn deck damage a new treadmill belt?
Yes. A rough, cracked, or deeply worn deck increases friction and can quickly wear the new belt. Inspect and replace the deck when it no longer provides a smooth surface.
Conclusion
Replacing a treadmill belt involves more than sliding a new belt over the deck. You must choose the correct part, inspect the deck and rollers, set equal tension, align the belt, and test the treadmill slowly.
Work with the power disconnected, take photos during disassembly, and make small tracking adjustments. If the machine has electrical faults or several worn parts, professional service is the safer choice.
With patience and proper maintenance, a new belt can restore smooth movement and extend the life of your treadmill. Use this guide as a checklist, follow your manufacturer’s instructions, and share your repair experience in the comments.

Brandon Knoxley is a sport & fitness writer and training guide contributor at MySportFitHub. He focuses on practical workouts, performance-based training, and honest fitness gear insights designed for real people and real results. Brandon is passionate about helping beginners and active individuals train smarter, avoid common mistakes, and build sustainable fitness habits.