

How To Install A Treadmill Belt: Easy Step Guide
To install a treadmill belt, unplug the machine, remove the deck, fit the belt, align it, and test it.
Learning how to install a treadmill belt is easier when you treat the job as a careful alignment task, not a quick swap. The belt must sit correctly around the rollers, move at the right tension, and receive proper lubrication. This guide explains the process in clear steps, including safety checks, common mistakes, and signs that your treadmill needs professional service.
What You Need Before Installing a Treadmill Belt
A treadmill belt is the moving surface that carries your steps. It runs over the front and rear rollers and slides across the walking deck. Over time, the belt may stretch, crack, fray, slip, or develop worn spots.
Before learning how to install a treadmill belt, check your owner’s manual. Treadmill frames differ by brand and model. Some belts require the deck to come out, while others allow belt replacement after loosening the rear roller.
Gather these tools:
- Replacement treadmill belt made for your exact model
- Phillips and flathead screwdrivers
- Allen wrench or hex key set
- Socket wrench set
- Adjustable wrench
- Torque wrench, if listed in the manual
- Vacuum or soft brush
- Clean cloth
- Silicone treadmill lubricant
- Work gloves
- Smartphone or camera for taking reference photos
A second person can also help. Treadmill decks can be heavy, wide, and awkward to hold. Never place your fingers near a roller while another person moves the belt.
The replacement belt should match the original belt’s length, width, thickness, and seam design. A belt that is only slightly too long can cause tracking problems. A belt that is too narrow may expose the walking deck and create a safety risk.

Safety Checks Before You Start
Safety comes first when you install a treadmill belt. A treadmill contains moving rollers, a heavy motor, electrical parts, and a deck that may pinch fingers. A few minutes of preparation can prevent a painful mistake.
Follow these steps before opening the machine:
- Turn the treadmill off.
- Unplug the power cord from the wall.
- Remove the safety key.
- Let the treadmill sit for several minutes.
- Move it to a clean, open work area.
- Raise or fold the treadmill only if the manual allows it.
- Keep children and pets away from the work area.
Do not work on a treadmill while it is connected to power. The console may appear off, but some parts can still hold electrical energy. If you smell burning, see damaged wires, or find a loose circuit board, stop and contact a qualified treadmill technician.
Wear gloves when handling the old belt. Its edges may contain stiff fibers or worn rubber. Use eye protection if you plan to brush dust from beneath the deck.
A useful safety rule is simple: if you cannot identify a part, do not force it. Take a photo, check the manual, or ask the manufacturer for a diagram.
Understand the Main Treadmill Parts
Knowing the parts makes it much easier to install a treadmill belt correctly. Most home treadmills use the same basic system.
Walking belt
the walking belt is the broad loop that you step on. It has a top surface with grip and a smoother underside that slides over the deck.
Walking deck
The deck supports your weight under the belt. It may be made from wood, composite material, or another smooth surface. Many decks have a low friction coating.
Front roller
The front roller sits near the motor. A pulley and drive belt connect it to the motor. This roller usually powers the walking belt.
Rear roller
The rear roller sits at the back of the treadmill. Left and right adjustment bolts control its position. These bolts help center and tension the belt.
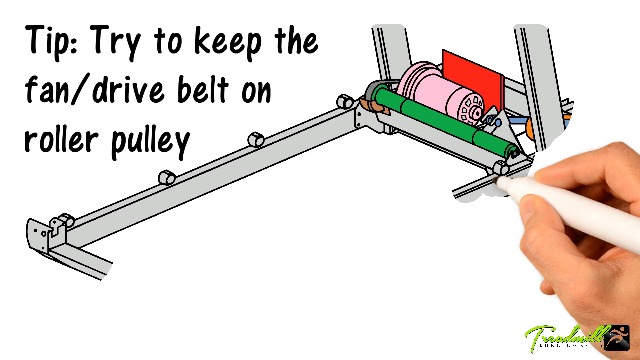
Drive belt
The drive belt connects the motor to the front roller. It is separate from the walking belt. Do not confuse the two during removal.
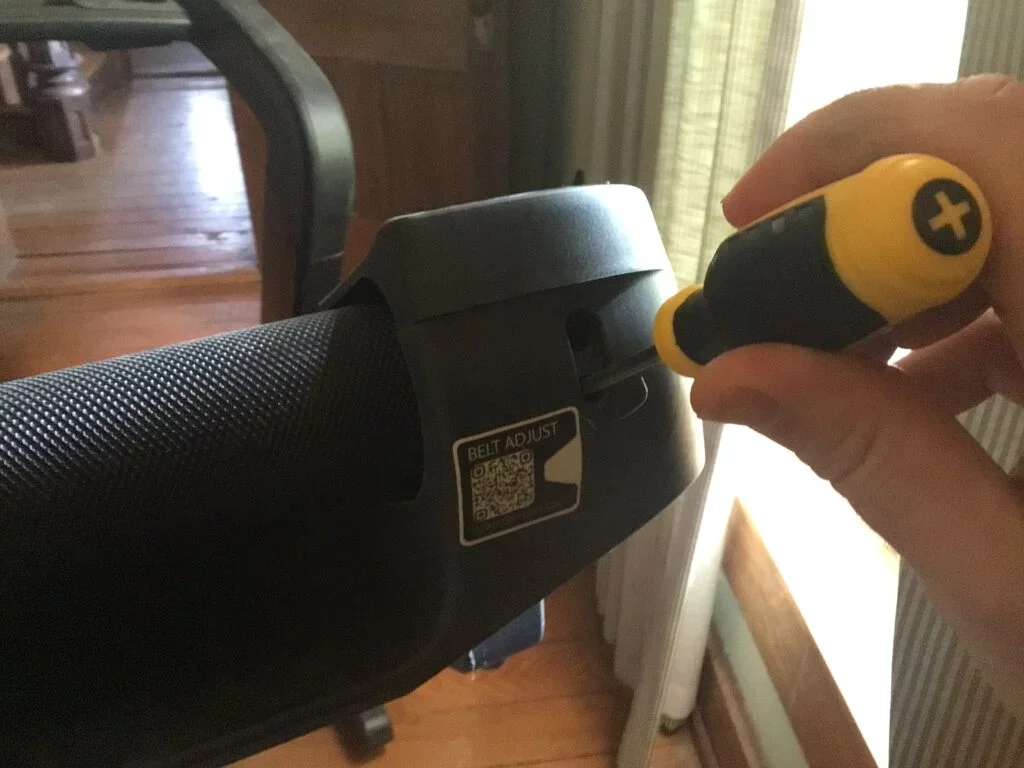
Belt adjustment bolts
These bolts sit near the rear roller. Turning them changes belt tension and tracking. Small adjustments are safer than large turns.
The belt should move smoothly across the deck without slipping, scraping, or drifting to one side. Think of it like a train on a track. The roller position keeps the belt centered, while proper tension keeps it from slipping.

How to Remove the Old Treadmill Belt
The first physical stage in learning how to install a treadmill belt is removing the old one without damaging nearby parts. Take photos at each stage. These images can help you restore the correct wire paths and bolt positions.
1. Remove the motor cover
Find the screws around the front motor cover. Remove them and place them in a small container. Lift the cover gently.
Do not pull hard if the cover catches. Some models have tabs or clips that must release first. Look for hidden screws beneath labels or plastic caps.
2. Loosen the rear roller
Find the adjustment bolts at the rear of the treadmill. Turn both bolts counterclockwise by the same amount. Count each turn.
For example, turn the left bolt four times, then turn the right bolt four times. This keeps the roller fairly even and makes later adjustment easier.
3. Remove the front roller if required
Some treadmills allow the walking belt to slide off after the rear roller is removed. Other models require front roller removal.
Before removing the front roller, inspect the drive belt and motor pulley. Take a photo of their position. Then remove the retaining hardware according to the manual.
4. Lift out the rear roller
Support the roller as you remove the adjustment bolts. Set the roller on a clean surface. Avoid dragging it across the floor, as dirt can enter the bearings.
5. Remove the old belt
Slide the belt away from the deck. If it feels stuck, check for hidden brackets, side rails, or deck bolts. Never cut the belt until you are sure it cannot be returned, especially if you may need to compare it with the new belt.
Inspect the deck after removal. Deep grooves, cracks, rough spots, or burned areas can damage a new belt. Replacing the belt without fixing a rough deck is like putting a new tire on a bent wheel.
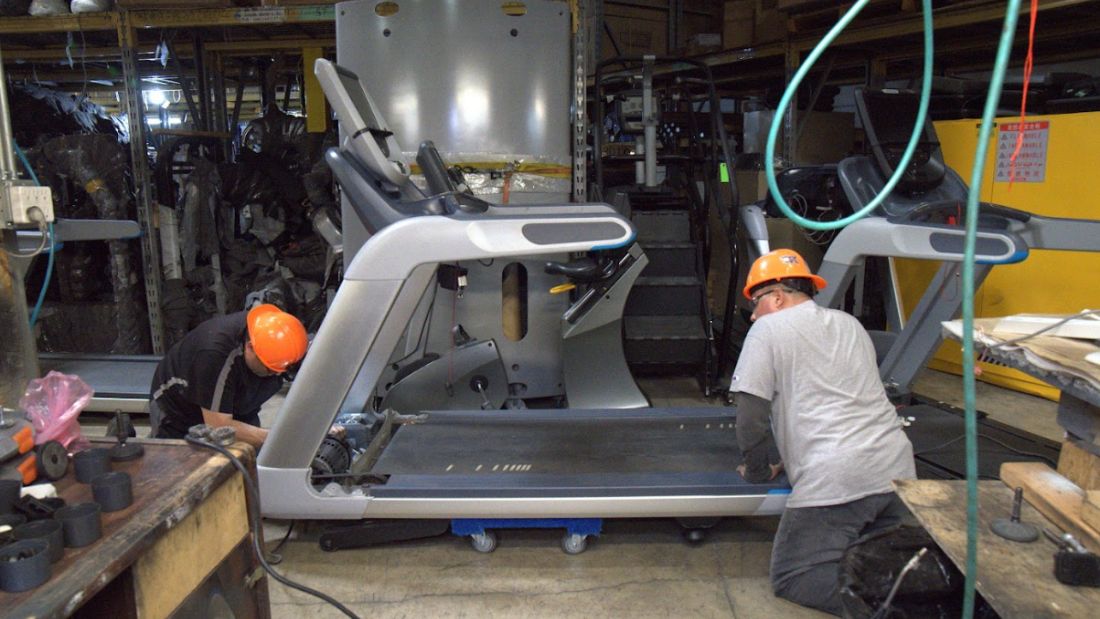
How to Install a Treadmill Belt Step by Step
Once the old belt is off, clean and inspect the treadmill before fitting the new one. This is the most important part of how to install a treadmill belt.
1. Clean the deck and rollers
Use a vacuum or soft brush to remove dust, rubber particles, and hair. Wipe the deck with a clean, dry cloth.
Do not use household oil, grease, or spray lubricant. These products can damage the belt and create a slippery surface. Use only lubricant approved for your treadmill.
Check both rollers for cracks, sharp edges, and heavy wear. Spin each roller by hand. It should turn smoothly without grinding or side play.
2. Check the belt direction
Lay the new belt flat. Look for arrows, a printed label, or a smooth inner surface. If the belt has a marked direction, follow it.
The textured walking surface faces upward. The smoother underside faces the deck. Installing the belt upside down can increase friction and cause poor performance.
3. Place the belt over the deck
Slide the belt over the deck. Center it as closely as possible from left to right.
The belt should rest flat. It should not twist. Make sure the seam, if present, sits evenly and does not fold under the deck.
4. Reinstall the front roller
Place the front roller inside the belt loop. Reconnect the drive belt to the motor pulley and front roller pulley.
The drive belt should sit in the pulley grooves. If it is twisted, the motor may vibrate or the front roller may turn unevenly.
5. Reinstall the rear roller
Place the rear roller inside the belt loop. Insert the adjustment bolts on both sides.
Start each bolt by hand. This prevents cross threading. Do not tighten one side fully before starting the other.
6. Tighten the belt lightly
Turn each rear adjustment bolt clockwise by the same number of turns. Use small steps, such as one quarter turn.
At this stage, the belt should be secure but not tight. Over tightening can strain the motor, rollers, and deck. It can also make the belt feel stiff under your feet.
7. Reinstall covers and side rails
Replace any side rails, plastic covers, and motor covers that you removed. Leave access to the rear adjustment bolts until final testing is complete.
If a cover rubs against the belt, stop and reposition it. Plastic rubbing can create heat and damage the belt edge.

How to Set Treadmill Belt Tension and Alignment
Correct tension and alignment determine whether your new treadmill belt works well. A belt that is too loose may slip during use. A belt that is too tight may overload the motor.
Check the belt tension
With the treadmill unplugged, lift the belt near the center of each side. The exact lift distance depends on the model, so use the manufacturer’s specification when available.
If the manual gives no measurement, the belt should lift enough for you to place your fingers beneath it, but it should not feel loose or sag heavily. This is only a general guide. Different belt and deck designs need different settings.
Center the belt
The belt should sit evenly between the side rails. If the belt moves left or right, use the rear roller bolts.
A common adjustment method is:
- Run the treadmill at a slow walking speed.
- Stand beside the treadmill, not on the belt.
- Watch the belt for several seconds.
- If it moves left, make a small adjustment to the left or right bolt as described in the manual.
- Wait for the belt to respond.
- Repeat in small steps.
Many treadmills respond to a quarter turn. Large adjustments can send the belt quickly toward one side.
Never reach over the moving belt. Keep your hands, hair, and clothing away from the rollers.
Avoid over tightening
A tight belt is not always a good belt. Excess tension can lead to:
- Motor overheating
- Increased electrical use
- Noisy operation
- Premature roller wear
- Deck damage
- Belt stretching
The belt should move freely when the treadmill runs. If the motor slows sharply when you step on the belt, stop the test and reduce tension slightly.
Lubricate the New Treadmill Belt
Many treadmill belts need silicone lubricant after installation. Lubricant reduces friction between the belt and deck. It does not fix poor alignment, a damaged deck, or incorrect tension.
Check the manual first. Some belts use a special coating and should not receive extra lubricant. Applying the wrong product may cause slipping or damage.
To lubricate a compatible belt:
- Turn off and unplug the treadmill.
- Lift one side of the belt.
- Apply the recommended silicone under the belt.
- Repeat on the other side.
- Move the belt by hand to spread the lubricant.
- Run the treadmill slowly for several minutes without standing on it.
- Wipe away any excess from the side rails.
Do not pour lubricant directly onto the top walking surface. It can make the belt dangerously slick.
As a practical rule, use less lubricant than you think you need. A small amount spread across the deck works better than a large puddle in one area.

Test the Treadmill After Belt Installation
Testing should happen in stages. This lets you catch a problem before it becomes a major repair.
First test: slow speed
Plug in the treadmill and insert the safety key. Start it at the lowest speed. Watch the belt for one to two minutes.
Look for:
- Side to side movement
- Belt hesitation
- Scraping sounds
- Clicking noises
- Roller wobble
- Motor strain
- Uneven belt edges
Stop the treadmill at once if the belt folds, catches, or moves sharply toward a side rail.
Second test: moderate speed
If the slow test looks normal, increase the speed gradually. Let the belt run without a person on it for several minutes.
Listen for changes in sound. A light humming sound is normal. Grinding, loud squealing, or repeated clicking may point to a roller, drive belt, motor, or alignment problem.
Third test: walking load
When the belt runs smoothly without a user, step onto the treadmill at a slow speed. Hold the handrails only for balance.
Walk for a few minutes. Pay attention to belt slipping or motor speed changes. A new belt may need a small final adjustment after it receives body weight.
Never jump onto a moving belt. Begin at a slow speed and step on from the side rails if needed.

Common Problems After Installing a Treadmill Belt
Even careful work can produce small issues. Most problems come from uneven tension, poor alignment, wrong belt size, or a worn deck.
The belt slips when I walk
A slipping belt may be too loose, but the drive belt may also be worn. First, unplug the treadmill and check the walking belt tension. Then inspect the motor drive belt for cracks, looseness, or glazing.
Make only small tension changes. If the belt still slips, the motor pulley or front roller may need inspection.
The belt moves to one side
This usually means the rear roller is not aligned evenly. Use the adjustment bolts in small steps while the treadmill runs slowly.
Do not keep turning the bolts without waiting. The belt may take several seconds to respond.
The belt makes a scraping sound
Check whether the belt touches a side rail, motor cover, or deck edge. Also inspect the belt seam for a raised area.
A scraping sound can signal a damaged deck or roller. Stop using the treadmill until you find the source.
The motor gets hot
Some warmth is normal, but excessive heat may indicate too much belt tension, poor lubrication, a worn deck, or a failing motor. Unplug the treadmill and allow it to cool.
If the motor trips a breaker or smells burned, stop testing it. Electrical diagnosis should be handled by a trained technician.
The new belt wrinkles
Wrinkles often appear when the belt is not centered or when one side has more tension than the other. Loosen the belt slightly, center it, and retension both sides evenly.
If the belt remains wrinkled, confirm that it is the correct size and that the rollers are straight.

Mistakes to Avoid When You Install a Treadmill Belt
Many belt replacement problems come from rushing. The following mistakes are easy to avoid.
- Using a universal belt without confirming the model
- Failing to unplug the treadmill
- Forgetting the direction of the original drive belt
- Tightening one rear bolt more than the other
- Applying household oil
- Over tightening the walking belt
- Ignoring a worn or grooved deck
- Testing at high speed too soon
- Reaching near a moving roller
- Skipping the final alignment check
One lesson worth remembering is that the rear adjustment bolts are not ordinary tightness screws. They control roller position as well as belt tension. Turning one side too much can solve one problem while creating another.
Take photos before removing parts. Mark bolt positions only as a reference, not as a final setting. A replacement belt may need a different adjustment from the old, stretched belt.
When to Hire a Treadmill Technician
Many home users can install a treadmill belt with basic tools and patience. However, some repairs are better left to a professional.
Contact a qualified technician if:
- The treadmill has exposed electrical damage
- The motor sparks or smells burned
- The deck is cracked or deeply worn
- A roller bearing feels rough
- The belt will not stay centered
- The motor stops under light walking pressure
- You cannot identify the correct replacement belt
- The treadmill is commercial grade or very heavy
- The repair requires circuit board testing
A technician may also be the better choice if the treadmill is under warranty. Opening the machine may affect warranty coverage, depending on the manufacturer’s terms.
Manufacturer instructions should take priority over general advice. Treadmill designs vary, and a procedure that works for one model may not suit another.
How to Maintain a Newly Installed Treadmill Belt
Proper maintenance helps the new belt last longer. It also reduces stress on the motor and deck.
Use these habits:
- Keep the treadmill in a dry, clean room.
- Vacuum around and beneath the machine.
- Check belt alignment every few weeks.
- Look for frayed edges or cracks.
- Lubricate only as often as the manual recommends.
- Keep shoes and clothing free from loose debris.
- Avoid placing the treadmill on an uneven floor.
- Do not exceed the machine’s user weight limit.
- Stop using the treadmill if the belt begins to catch.
Dust acts like fine sand beneath the belt. It increases friction and can wear both the deck and belt. A quick cleaning routine is often more useful than adding extra lubricant.
Record the installation date and any lubrication date. This simple note makes future maintenance easier and helps you spot changes in belt performance.
Frequently Asked Questions About How to Install a Treadmill Belt
How long does it take to install a treadmill belt?
Most home treadmill belt replacements take about one to three hours. The time depends on the treadmill design, your tools, and whether the deck or rollers must be removed.
Can I install a treadmill belt by myself?
You can install many home treadmill belts yourself if you have the correct replacement part and follow the manual. A second person is helpful when lifting the deck or holding a roller.
How tight should a treadmill belt be after installation?
The belt should be firm but still move freely across the deck. Use the tension measurement in the owner’s manual whenever possible, because belt designs and treadmill models vary.
Why does my new treadmill belt slip?
A new belt may slip because it is too loose, the drive belt is worn, the deck has high friction, or the motor pulley is damaged. Check tension and lubrication first, then inspect the drive system.
How do I know if my treadmill belt is centered?
The belt is centered when it runs evenly between both side rails without touching either edge. Watch it at slow speed and make small, equal adjustments as needed.
Should I lubricate a new treadmill belt?
Many new belts need silicone lubricant, but not all do. Check the treadmill manual or belt instructions before applying anything, and never use household oil.
Can a worn deck damage a new treadmill belt?
Yes. A rough, grooved, or cracked deck can increase friction and wear the new belt quickly. Inspect the deck during replacement and repair or replace it when necessary.
Conclusion
Installing a treadmill belt is a careful process that involves safe shutdown, correct belt placement, even roller adjustment, proper lubrication, and slow testing. The most important steps are using the exact belt for your model, avoiding excess tension, and checking alignment before walking on the machine.
Take your time, follow the manufacturer’s instructions, and stop if the treadmill shows electrical damage or severe mechanical wear. With the right tools and a patient approach, you can restore a smooth, safe walking surface and extend the life of your treadmill. Share your experience or explore your model’s maintenance guide before starting the repair.

Brandon Knoxley is a sport & fitness writer and training guide contributor at MySportFitHub. He focuses on practical workouts, performance-based training, and honest fitness gear insights designed for real people and real results. Brandon is passionate about helping beginners and active individuals train smarter, avoid common mistakes, and build sustainable fitness habits.